Ok... as requested, this thread is dedicated to the Boot (M) Logo editing process. I did not come up with the "Hack" file that was started in order to make this work. Team Black Hat started a thread HERE. Also, there are instructions out there on how to do this, but some people are getting confused.
Here are the tools needed.
1) An Image Editor. I use GIMP 2. Its Free! Download GIMP 2.6 HERE
2) Frhed Hex Editor. Download HERE
3) 7Zip. Download HERE
4) LogoReplacer.Zip file attached.
First thing is create the image. Here's one I'll use for the DIY.

Open the image using GIMP.
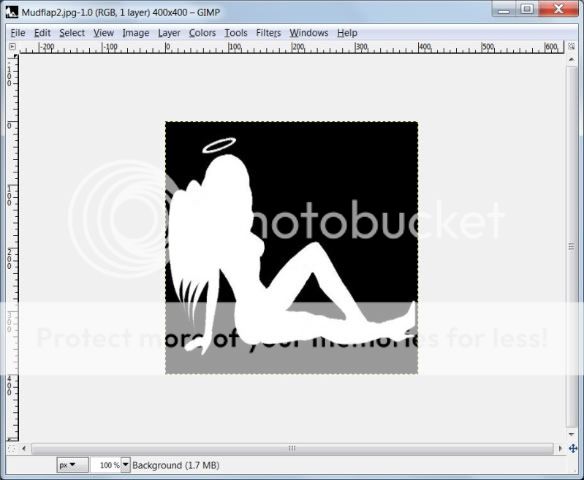
Most images are not sized correctly. They MUST be 480 pixels wide and 182 pixels tall.
Go to Image... Scale Image.
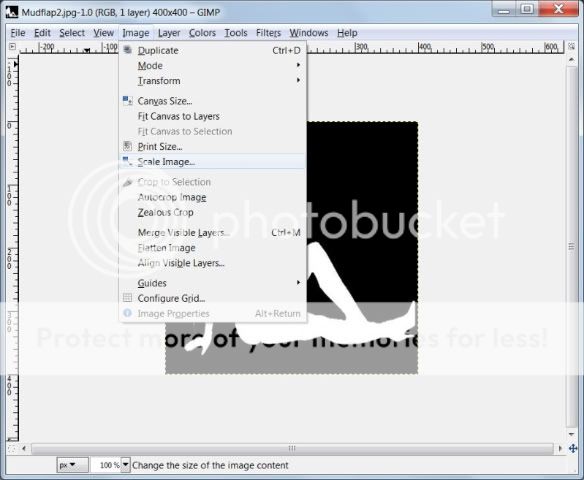
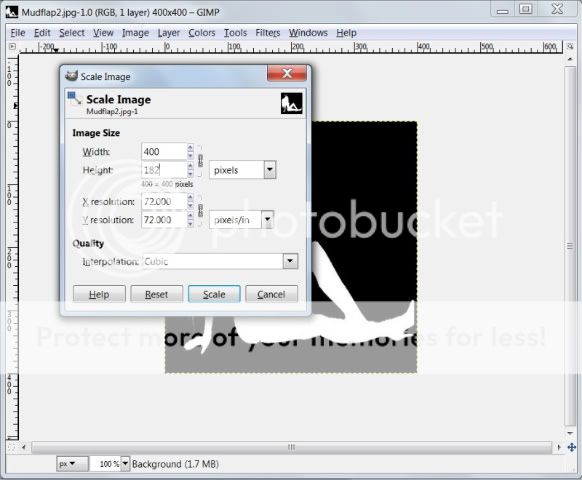
In the height part edit and make 182. Allow the image to stretch to this in order to retain proportion. This image is 400 X 400. Making the height 182, it will change the width to 182 automatically if the "Chain" is left linked. Then click Scale.
Now we need to make the image 480 wide. Go back to Image..... Canvas Size.
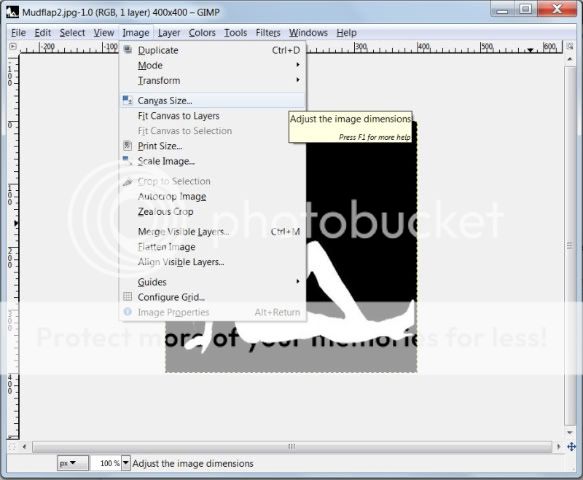
Once that opens, UNLINK the CHAIN next to the Canvas Size area

UNLINKED.....
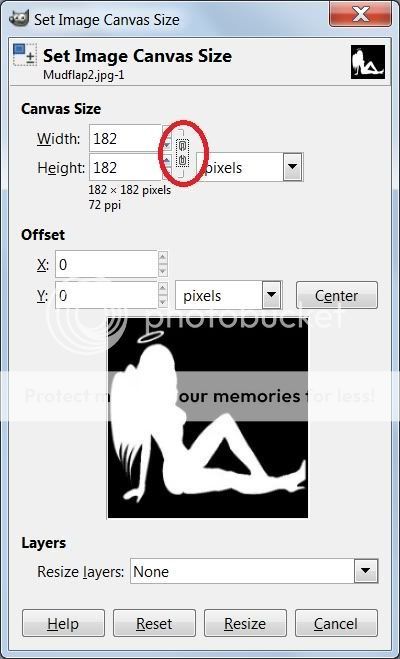
Then change the Width to 480.... and click Resize.
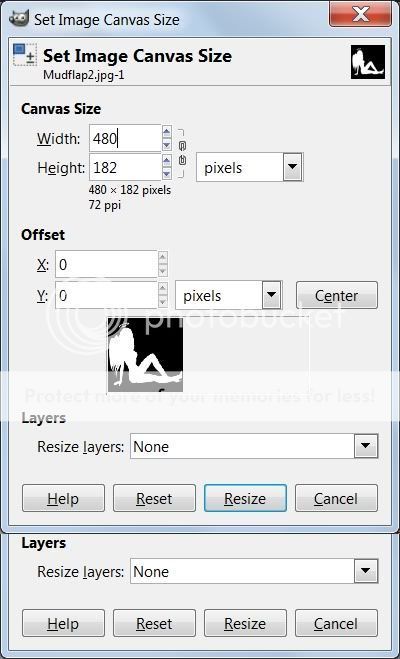
Now we need to move the image to the center... Click the Move Tool... then drag the image to the center.

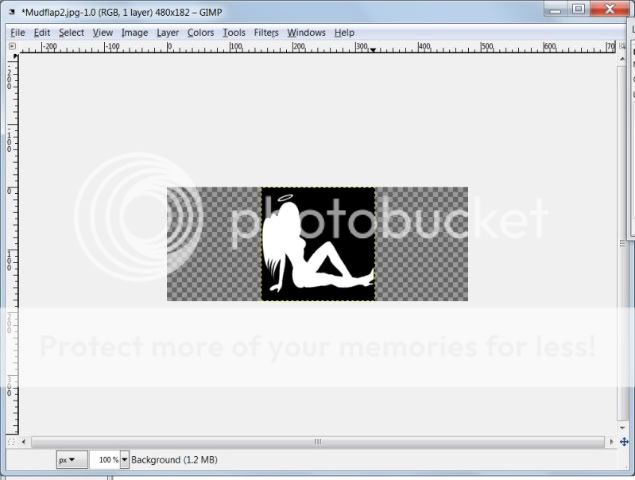
and now add the black background. In order to do this, I change my view to include "Layers". Hit CTRL + L. This will open it.
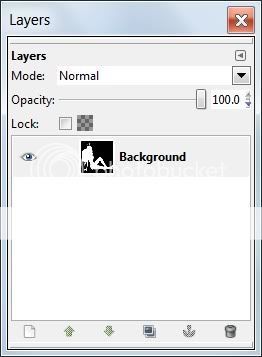
Click the little white "Sheet of paper at the bottom to ADD a layer". As long as the "Foreground" (Main Color) is set to black.... you can click Foreground... and just click ok.


OH NO.... BLACK!!! No worries.... It's just a layer overtop of the other layer. Go to the Layer window and DRAG the new Black Layer below the main layer usually called Background.
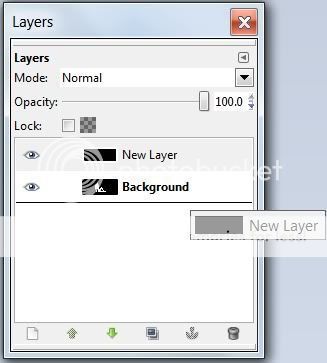

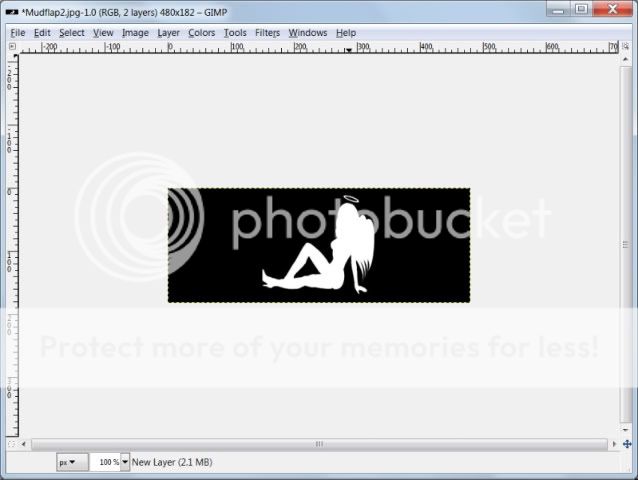
ALMOST DONE! (with the image anyway)
NOTE!!!!! ** WHATEVER COLOR IS THE BORDER (1PX) WILL BE THE COLOR OF THE SCREEN **
If you want the image to be seen in the current orientation... we have to flip the image horizontally. This is due to the phones programming.

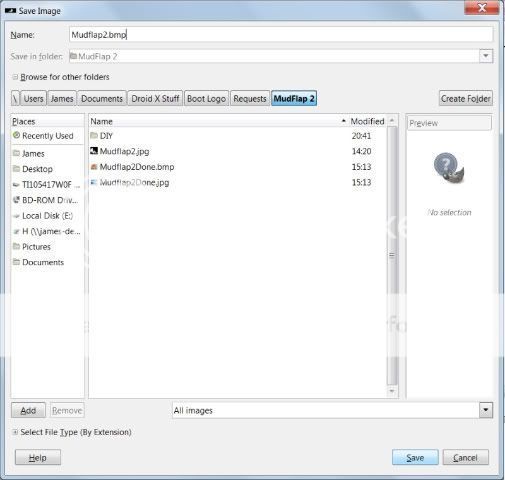
Now click File.... Save As... Change the file extension up top to BMP. so... FileName.bmp... and click save.
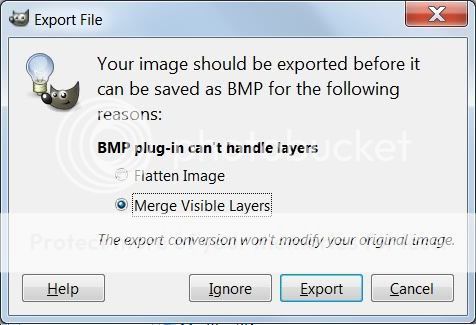
It will prompt for Merging the layers.... that's good.... Click Export.
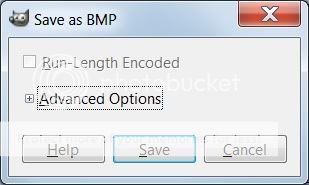
Then hit the + next to Advanced...
Click 24 Bit...
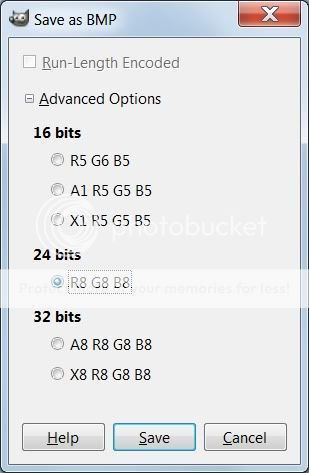
Woohoo... Image ready for Hex Editing.
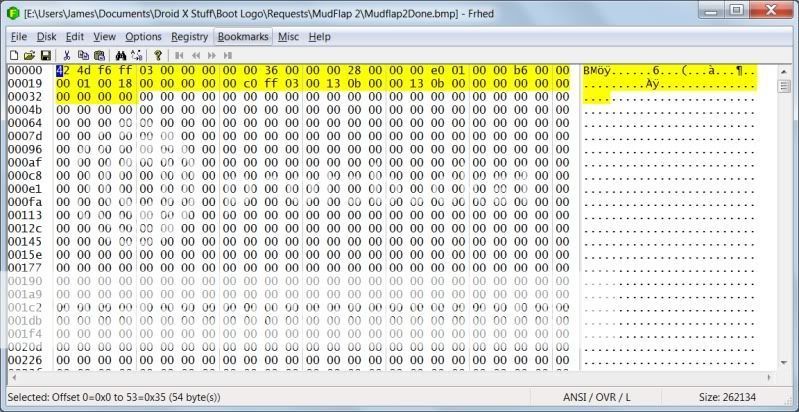
Open Frhed and go to File Open.... and find the final BMP file you just created. Highlight the first 54 Bytes and click DELETE on your keyboard.
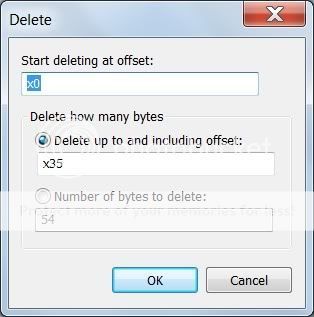
Leave the defaults and click OK.
Hit CTRL + A in order to select all the bytes. Hopefully your file is the correct size. At the bottom of the screen it should say (262080 byte(s)). If there is any descrepency... some say it can be off by 2 bytes. GO to the very end of the file in Frhed... and delete the last 2 bytes.
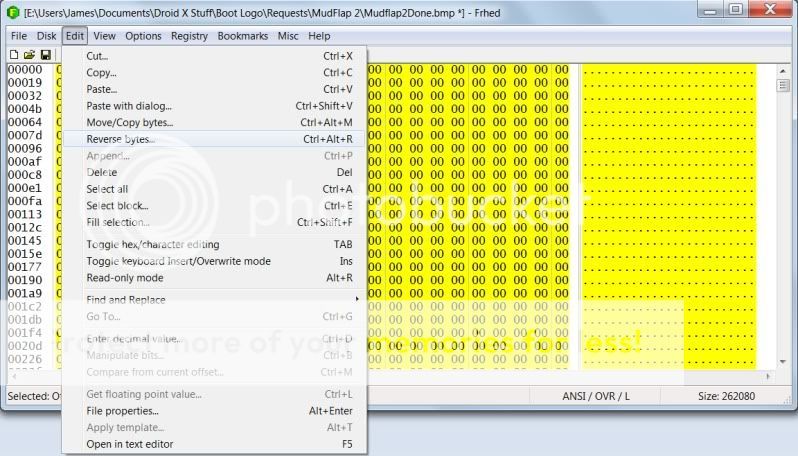
Then go to edit and "Reverse Bytes".
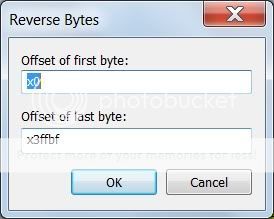
Leave the Defaults... and click ok.
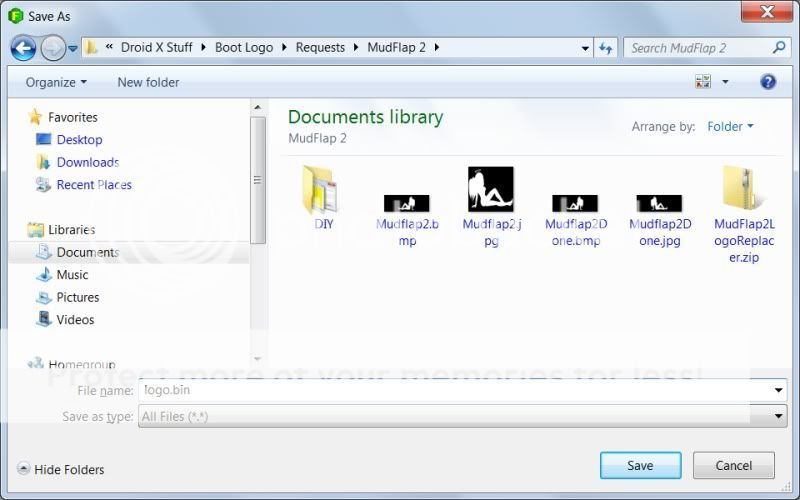
Now go to File and Save As. Name the new file "logo.bin" EXACTLY! and click save.
ALMOST DONE!
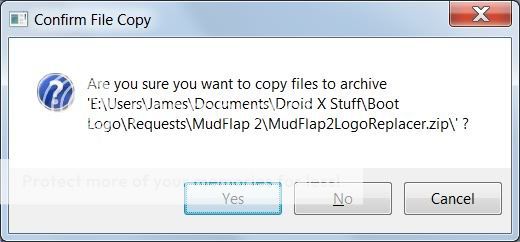
Open the LogoReplacer.Zip file with 7Zip. With the location of the logo.bin file opened within another window.... and 7Zip open to the side of it.... DRAG the logo.bin file overtop of 7Zip. It will ask you if you want to copy files to zip. YES!.

Ok. Now the file is ready to be flashed. Copy the file to your SD card on your phone.... Reboot into recovery.... and install the file from ZIP. REBOOT!
ENJOY!!!
Here are the tools needed.
1) An Image Editor. I use GIMP 2. Its Free! Download GIMP 2.6 HERE
2) Frhed Hex Editor. Download HERE
3) 7Zip. Download HERE
4) LogoReplacer.Zip file attached.
First thing is create the image. Here's one I'll use for the DIY.

Open the image using GIMP.

Most images are not sized correctly. They MUST be 480 pixels wide and 182 pixels tall.
Go to Image... Scale Image.

In the height part edit and make 182. Allow the image to stretch to this in order to retain proportion. This image is 400 X 400. Making the height 182, it will change the width to 182 automatically if the "Chain" is left linked. Then click Scale.

Now we need to make the image 480 wide. Go back to Image..... Canvas Size.

Once that opens, UNLINK the CHAIN next to the Canvas Size area

UNLINKED.....

Then change the Width to 480.... and click Resize.

Now we need to move the image to the center... Click the Move Tool... then drag the image to the center.


and now add the black background. In order to do this, I change my view to include "Layers". Hit CTRL + L. This will open it.

Click the little white "Sheet of paper at the bottom to ADD a layer". As long as the "Foreground" (Main Color) is set to black.... you can click Foreground... and just click ok.


OH NO.... BLACK!!! No worries.... It's just a layer overtop of the other layer. Go to the Layer window and DRAG the new Black Layer below the main layer usually called Background.


ALMOST DONE! (with the image anyway)
NOTE!!!!! ** WHATEVER COLOR IS THE BORDER (1PX) WILL BE THE COLOR OF THE SCREEN **
If you want the image to be seen in the current orientation... we have to flip the image horizontally. This is due to the phones programming.


Now click File.... Save As... Change the file extension up top to BMP. so... FileName.bmp... and click save.

It will prompt for Merging the layers.... that's good.... Click Export.

Then hit the + next to Advanced...

Click 24 Bit...

Woohoo... Image ready for Hex Editing.
Open Frhed and go to File Open.... and find the final BMP file you just created. Highlight the first 54 Bytes and click DELETE on your keyboard.

Leave the defaults and click OK.

Hit CTRL + A in order to select all the bytes. Hopefully your file is the correct size. At the bottom of the screen it should say (262080 byte(s)). If there is any descrepency... some say it can be off by 2 bytes. GO to the very end of the file in Frhed... and delete the last 2 bytes.
Then go to edit and "Reverse Bytes".

Leave the Defaults... and click ok.

Now go to File and Save As. Name the new file "logo.bin" EXACTLY! and click save.

ALMOST DONE!
Open the LogoReplacer.Zip file with 7Zip. With the location of the logo.bin file opened within another window.... and 7Zip open to the side of it.... DRAG the logo.bin file overtop of 7Zip. It will ask you if you want to copy files to zip. YES!.


Ok. Now the file is ready to be flashed. Copy the file to your SD card on your phone.... Reboot into recovery.... and install the file from ZIP. REBOOT!
ENJOY!!!
Last edited:
