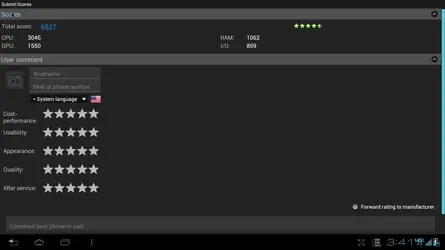
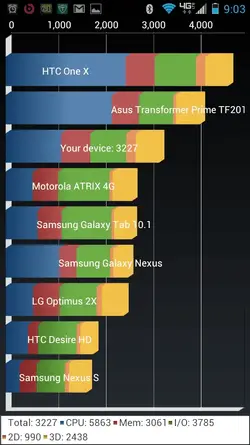
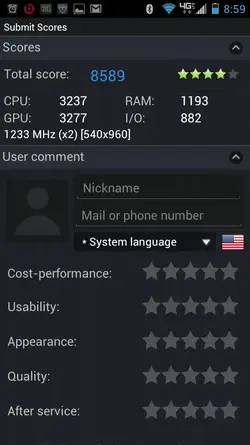
Antutu @1.2ghz Stock 232 ICS Webtop with Swap Space @900MB
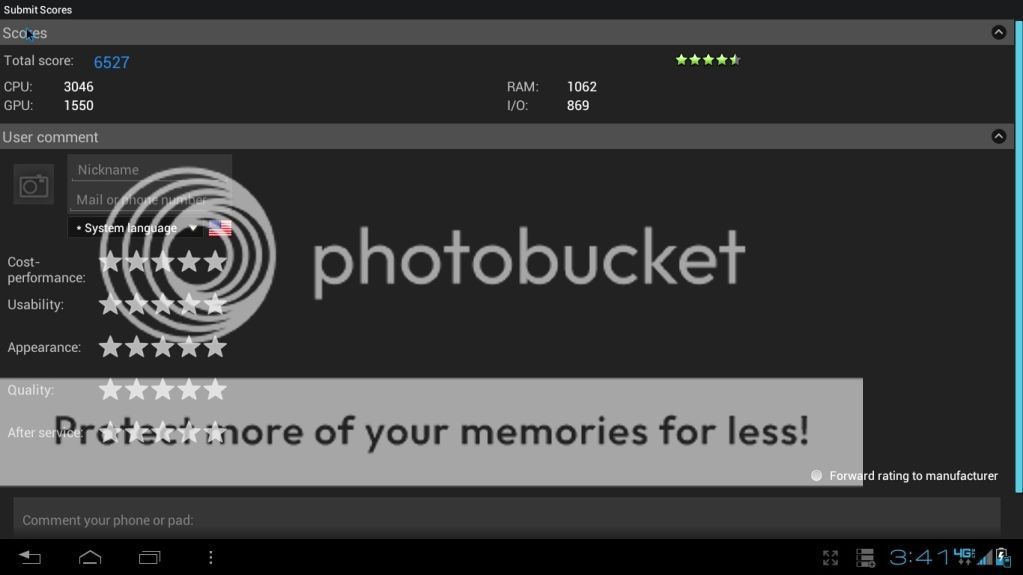
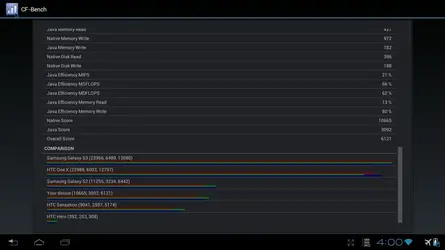
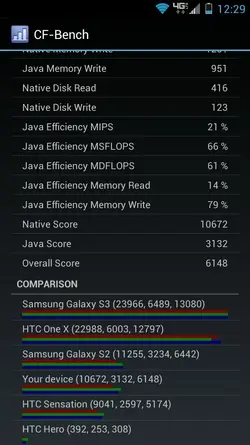
CF Bench @1.2ghz Stock 232 ICS Webtop with Swap Space @900MB

Antutu @1.2ghz Stock 232 ICS with Swap Space @900MB

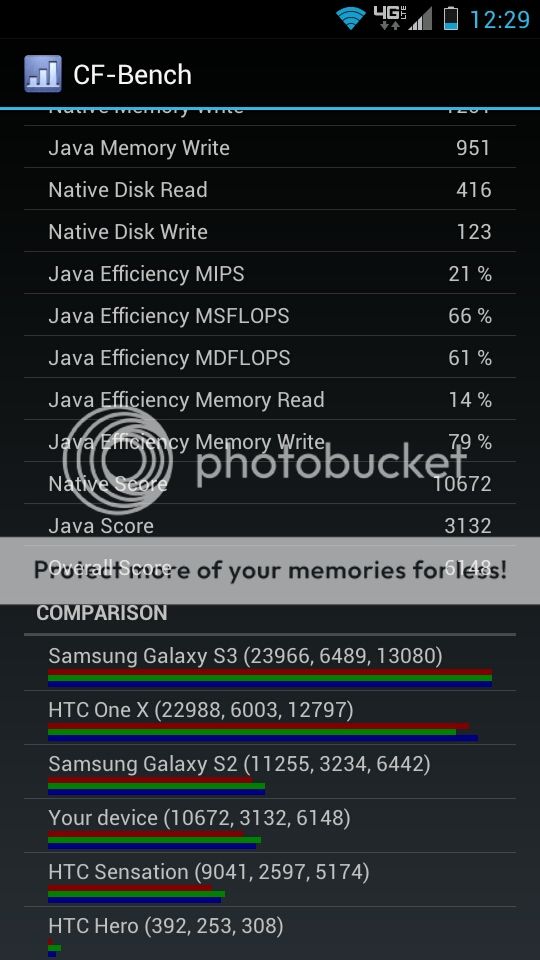
CF Bench @1.2ghz Stock 232 ICS with Swap Space @900MB
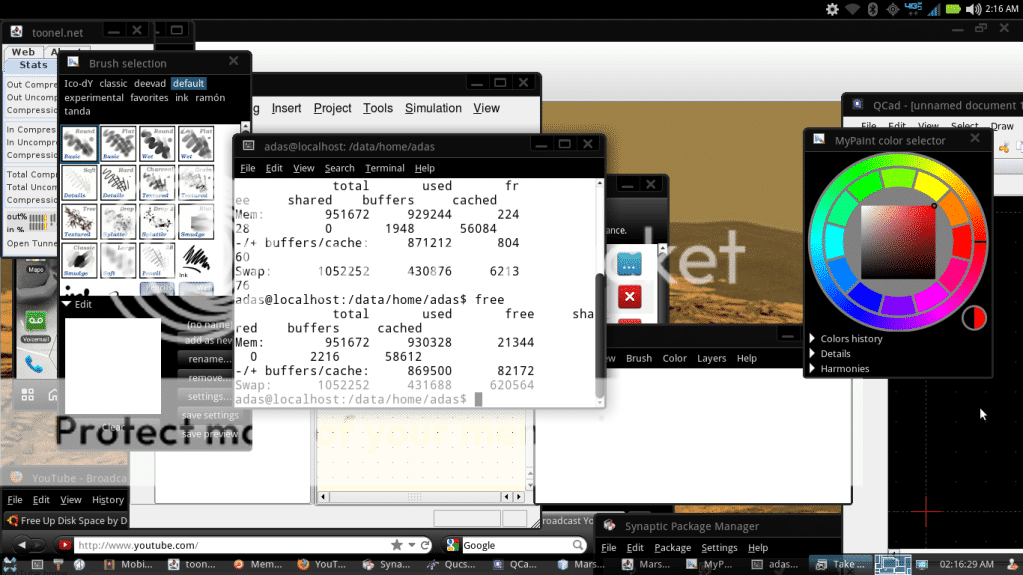
Webuntu2sd @1.23
#If someone with 1.3ghz OC can try this out and post antutu benchmark image it would be great!
Download link to flashable init.d swap (must have working init.d for this to work). Thanks to twinkyz1979 for this!
Dev-Host - Bionic_Swap_Installer-signed.zip - The Ultimate Free File Hosting / File Sharing Service
Download link for init.d support. Thanks to twinkyz1979 for this!
Dev-Host - Bionic_init.d_Installer-signed.zip - The Ultimate Free File Hosting / File Sharing Service
*Disclaimer - I do not take credit for this procedure since I had to find bits and pieces from other threads.**I did adjust some of the code accordingly for the Bionic though.**Use this at your own risk!**I AM NOT RESPONSIBLE FOR WHAT YOU DO TO YOUR DEVICE!
Swap space is a partition in Linux based OS’ that allows the users physical ram to be freed by moving unused inactive data to a separate partition (swap) that way freeing up physical ram for the OS and active applications.**In this procedure you will learn how to:
A.**Create a swap partition on your external sd card.
B:**Activate that swap partition through your Android OS.
This is for the multi taskers.**I have seen performance increase in GB and tried my hardest to force close apps by running numerous video, audio, web browser, painting apps etc, and GB kept on ticking with no FC or reboot.**I also saw nice jumps in benchmarks (Antutu : 75-100 point, CF Bench: 100-200+).
**I highly recommend using a class 10 external SD card for this to work optimally (will work with other speeds though).**
***This will decrease the life expectancy of your SD card since you will be reading/writing more than usual.
****This has been tested to work on ICS and performance increase have been verified.**On GB it does increase performance and stability on my phone.
*****I have tried this and found being on stock governor is the most stable.**Stock governor highly recommended.**Over clock is OK.
With that being said...let’s begin-
Creating Swap space partition:
1. Back up your external sd card.
2.**Download MiniTool Partition Wizard Home Edition here --->****http://download.cnet...tml?tag=mncol;1
3. Remove external sd card from phone and connect to a pc using an adapter or sd card slot.**Do not do it through your phone!
4.**Depending on how you want to do it you can resize existing partition or start from scratch.**I recommend deleting the existing fat32 partition and starting fresh.**
5. Right click your sd card in mini tools and delete existing partition.
6.**Right click again and create a new fat32 primary partition leaving 512BM(recommended) available or minimum 200mb of unallocated space.
7. Click apply.
8.**Now create a swap partition in your unallocated space by right clicking and choosing primary linux swap (make sure to use all unallocated space).
8.**Click apply.
9.**Return backed up data.
Detecting and Enabling Swap in Android-
Now that we have our partition you will need to use adb or terminal you will need to do this:
1. In adb or terminal execute this:
********A. su
********B. fdisk -l dev/block/mmcblk0
2. You should see your partition labeled Linux swap, write down the number, remember it, take a picture..lol
3.**Now execute this : swapon /dev/block/mmcblkXXX (XXX being your partitions identifiers).
4. Finally execute this:**echo 100 > /proc/sys/vm/swappiness
5. Finished but this will not survive reboot.**Look below for methods that will.
Creating Smanager script (execute code at boot through script, easiest method) -
******Make sure you have tested code before creating init.d or script
1. Using Smanager (Free from play store) create a new file and name it androidswap.sh
2. Edit the file and add this:
#!/system/bin/sh
swapon /dev/block/mmcblkXXX**************** (XXX being your partitions identifiers)
echo 100 > /proc/sys/vm/swappiness
3.**Save the file.**Right click it and choose open as script executable.
4. Click "su" and "boot" and choose save configuration.
5. Finished.**Now everytime android boots it will execute this and swap will be enabled.
Creating init.d script (you must have init.d support to do this)-
******Make sure you have tested code before creating init.d or script
1.**Using rootexplorer go to /system/etc/init.d and create a new file called androidswap
2. Make dir rw by clicking the rw button at the top.
3. Edit the file and input this and save after-
#!/system/bin/sh
swapon -a
echo 100 > /proc/sys/vm/swappiness
4. Go to /system/etc (make rw again by clicking rw) and create new file and call it fstab
5.**Input this into the file and save:
/dev/block/mmcblkXXX swap swap**********(XXX being your partitions identifiers)
6. Now using adb/terminal execute this:
****A. su
****B. chmod 750 /system/etc/init.d/androidswap**
7.**Finished.**This should survive reboot now. (Note: init.d method would not work for me on GB but it might work for you.**If it doesn't try smanager it's much easier.)
I would like to thank Segnale007 for his work which I used as a template, Sogarth who taught me how to create a linux swap space, twinkyz1979 for testing on ICS leak 238, and the whole Droidhive community!

CF Bench @1.2ghz Stock 232 ICS Webtop with Swap Space @900MB

Antutu @1.2ghz Stock 232 ICS with Swap Space @900MB

CF Bench @1.2ghz Stock 232 ICS with Swap Space @900MB

Webuntu2sd @1.23

#If someone with 1.3ghz OC can try this out and post antutu benchmark image it would be great!
Download link to flashable init.d swap (must have working init.d for this to work). Thanks to twinkyz1979 for this!
Dev-Host - Bionic_Swap_Installer-signed.zip - The Ultimate Free File Hosting / File Sharing Service
Download link for init.d support. Thanks to twinkyz1979 for this!
Dev-Host - Bionic_init.d_Installer-signed.zip - The Ultimate Free File Hosting / File Sharing Service
*Disclaimer - I do not take credit for this procedure since I had to find bits and pieces from other threads.**I did adjust some of the code accordingly for the Bionic though.**Use this at your own risk!**I AM NOT RESPONSIBLE FOR WHAT YOU DO TO YOUR DEVICE!
Swap space is a partition in Linux based OS’ that allows the users physical ram to be freed by moving unused inactive data to a separate partition (swap) that way freeing up physical ram for the OS and active applications.**In this procedure you will learn how to:
A.**Create a swap partition on your external sd card.
B:**Activate that swap partition through your Android OS.
This is for the multi taskers.**I have seen performance increase in GB and tried my hardest to force close apps by running numerous video, audio, web browser, painting apps etc, and GB kept on ticking with no FC or reboot.**I also saw nice jumps in benchmarks (Antutu : 75-100 point, CF Bench: 100-200+).
**I highly recommend using a class 10 external SD card for this to work optimally (will work with other speeds though).**
***This will decrease the life expectancy of your SD card since you will be reading/writing more than usual.
****This has been tested to work on ICS and performance increase have been verified.**On GB it does increase performance and stability on my phone.
*****I have tried this and found being on stock governor is the most stable.**Stock governor highly recommended.**Over clock is OK.
With that being said...let’s begin-
Creating Swap space partition:
1. Back up your external sd card.
2.**Download MiniTool Partition Wizard Home Edition here --->****http://download.cnet...tml?tag=mncol;1
3. Remove external sd card from phone and connect to a pc using an adapter or sd card slot.**Do not do it through your phone!
4.**Depending on how you want to do it you can resize existing partition or start from scratch.**I recommend deleting the existing fat32 partition and starting fresh.**
5. Right click your sd card in mini tools and delete existing partition.
6.**Right click again and create a new fat32 primary partition leaving 512BM(recommended) available or minimum 200mb of unallocated space.
7. Click apply.
8.**Now create a swap partition in your unallocated space by right clicking and choosing primary linux swap (make sure to use all unallocated space).
8.**Click apply.
9.**Return backed up data.
Detecting and Enabling Swap in Android-
Now that we have our partition you will need to use adb or terminal you will need to do this:
1. In adb or terminal execute this:
********A. su
********B. fdisk -l dev/block/mmcblk0
2. You should see your partition labeled Linux swap, write down the number, remember it, take a picture..lol
3.**Now execute this : swapon /dev/block/mmcblkXXX (XXX being your partitions identifiers).
4. Finally execute this:**echo 100 > /proc/sys/vm/swappiness
5. Finished but this will not survive reboot.**Look below for methods that will.
Creating Smanager script (execute code at boot through script, easiest method) -
******Make sure you have tested code before creating init.d or script
1. Using Smanager (Free from play store) create a new file and name it androidswap.sh
2. Edit the file and add this:
#!/system/bin/sh
swapon /dev/block/mmcblkXXX**************** (XXX being your partitions identifiers)
echo 100 > /proc/sys/vm/swappiness
3.**Save the file.**Right click it and choose open as script executable.
4. Click "su" and "boot" and choose save configuration.
5. Finished.**Now everytime android boots it will execute this and swap will be enabled.
Creating init.d script (you must have init.d support to do this)-
******Make sure you have tested code before creating init.d or script
1.**Using rootexplorer go to /system/etc/init.d and create a new file called androidswap
2. Make dir rw by clicking the rw button at the top.
3. Edit the file and input this and save after-
#!/system/bin/sh
swapon -a
echo 100 > /proc/sys/vm/swappiness
4. Go to /system/etc (make rw again by clicking rw) and create new file and call it fstab
5.**Input this into the file and save:
/dev/block/mmcblkXXX swap swap**********(XXX being your partitions identifiers)
6. Now using adb/terminal execute this:
****A. su
****B. chmod 750 /system/etc/init.d/androidswap**
7.**Finished.**This should survive reboot now. (Note: init.d method would not work for me on GB but it might work for you.**If it doesn't try smanager it's much easier.)
I would like to thank Segnale007 for his work which I used as a template, Sogarth who taught me how to create a linux swap space, twinkyz1979 for testing on ICS leak 238, and the whole Droidhive community!

